Sunday, January 23, 2011

Eryn's Shower


Last summer I promised my daughter's friend Eryn that I would write something about her shower. I know it's a bit late but this is for you Eryn.

My daughter Andrea met Eryn in Grad school where they were both studying architecture. There they became friends and found that they had a lot in common and soon became inseparable. When Eryn became engaged, she asked Andrea to be her maid of honour. Delighted, Andrea decided she would host a bridal shower for her and so she asked me if I would prepare some food for the event and of course I was more that happy to help.
Andrea worked very hard taking care of every detail, including designing the invitations, so that the shower would be a success. The invitations were sent and replied to and soon the special day arrived. It was a beautiful warm sunny day, which we'd hoped for so that we could have the shower outside. It was a bit breezy but no one seemed to mind. Everyone arrived to drinks and hor'dourves and bruschetta and then the shower games began.


Everyone seemed to enjoy themselves including Reena who flew in from Lagos.
Mary the mother of the bride-to-be and close friend Aline were having too much fun trying to guess how many nuts were in the boxers. I think they wanted to win the prize.
The luncheon included four different quiches; crab, quiche lorraine, asparagus and broccoli, spinach and pear and feta cheese salad, a pasta salad and Rose's Best Buns.

For dessert I had made sugar cookies in the shapes of flowers decorated with royal icing in the theme colours of pink and light green. There were also chocolate cookies, slices of currant pound cake, and truffles and fruit on the dessert table. But the crowning glory was the lovely cake by Irene's Cakes. It was a mixed berries shortcake covered with fondant and decorated with pink, green and yellow flowers.


Eryn opened her gifts, one of which she would not take out of the gift bag because it was naughty.

It was fun watching her giggle uncontrollably.
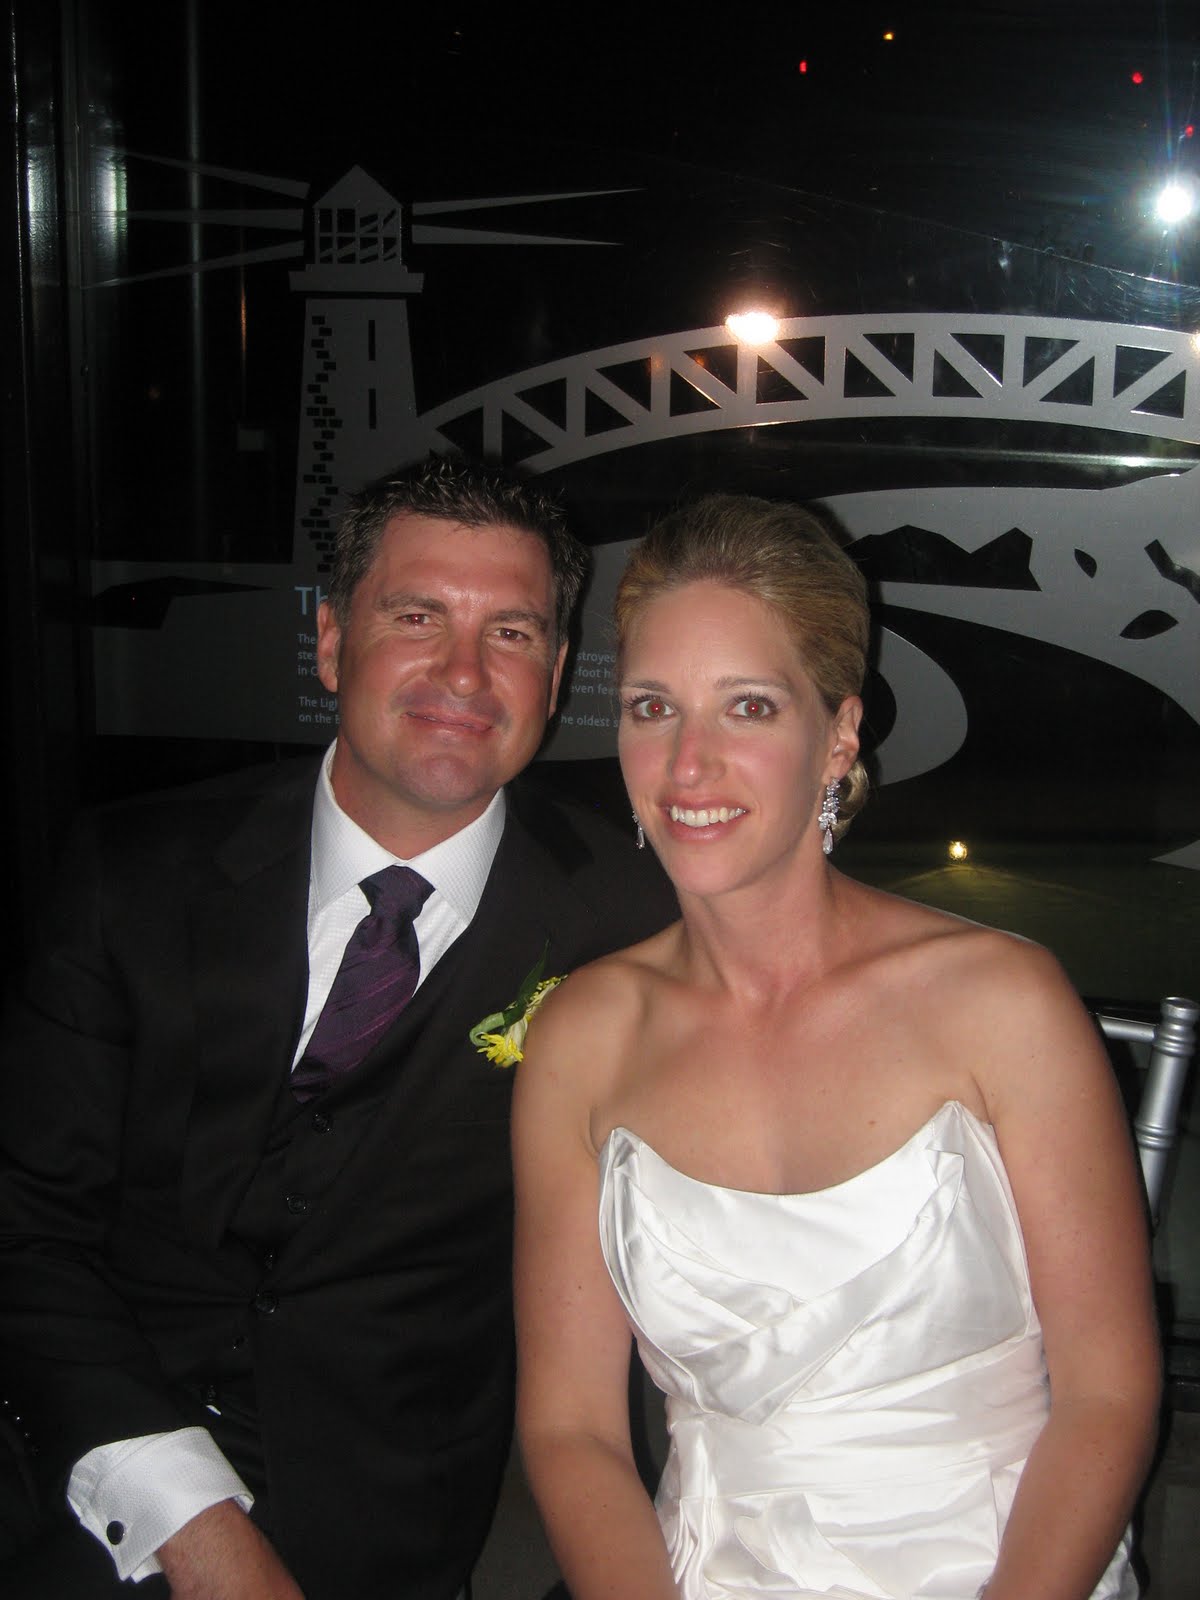
Eryn with Geraldine, her mother-in-law to be, and her mother Mary.


Each guest left with a party favour - an espresso cup and saucer with truffles wrapped in cellophane.

In September Eryn married her long time boyfriend Chris, a sailor who competed in the 2008 Olympics in Beijing, in a lovely ceremony by the lake.

Sunday, January 16, 2011

Rosemary Baguettes


My parents always had rosemary growing in their garden, that wonderfully fragrant herb that flavoured our Sunday roasts and many other dishes my mother would prepare for us. When I acquired a yard of my own I began to grow rosemary as well so that I could have on hand sprigs of this herb to flavour my roasts and sauces. The only downside of growing rosemary in Canada is that it does not survive our long cold sub-zero winter season. My rosemary grows in a large container that I bring indoors sometime in November for the winter. The funny thing is that I store it in my cold cellar which has a small window and during the winter months its temperature is around zero degrees Celsius, and there it thrives. I have tried leaving it in a warmer room of the house but the environment caused the leaves to mildew, and eventually the rosemary plant would succumb to this powdery white invader and die. In the cold cellar as the days get longer the plant receives more sunlight and it begins to bud. By April or May depending on how cold the nights are I put the plant outdoors again and the buds open up to pretty little blue flowers.


One of my favourite ways to use rosemary is in bread. Though rosemary has a distinct and pungent flavour, when baked in bread its flavour isn't over powering at all. For this particular bread I use my old and faithful recipe for Basic Bread for Fougasse by Patricia Wells. I love this wonderful and versatile straight method dough that I use often for baguettes and pizzas, as well as the Onion Focaccia that I have posted a while ago and where you will find the recipe.

I just chop up about one tablespoon of rosemary and add it to the dough. I love the little green speck of rosemary and the soft dough is marvelous to work with.

After its final rise I shape and slash the bread and bake it in a hot 425 degrees F. oven and while it is baking the house is filled with a wonderful aroma. When I pull the baquettes out of the oven I can hardly wait to have a slice, but to resist the temptation to cut into the bread, I leave the room and come back later to enjoy a slice with butter. This bread is especially wonderful with roasted meats.
Yeastspotted.

Tuesday, January 11, 2011

Toasted Raisin Cranberry Slices


I love hors d'oeuvres but quite frankly do not enjoy making them at all. I find them time consuming and finicky to make and they are the last thing I think about when I am having people over for dinner. Eventually however, I do have to think about what to serve as a pre- dinner course so when the idea to serve baked brie or cambozola on crispy slices of raisin cranberry bread came to me I was quite pleased with myself and wondered why I hadn't though about this sooner. I would make the bread in advance, toast the sliced bread and store them in the freezer until I needed them, then just arrange them and the cheese on a platter and voila easy peasy.

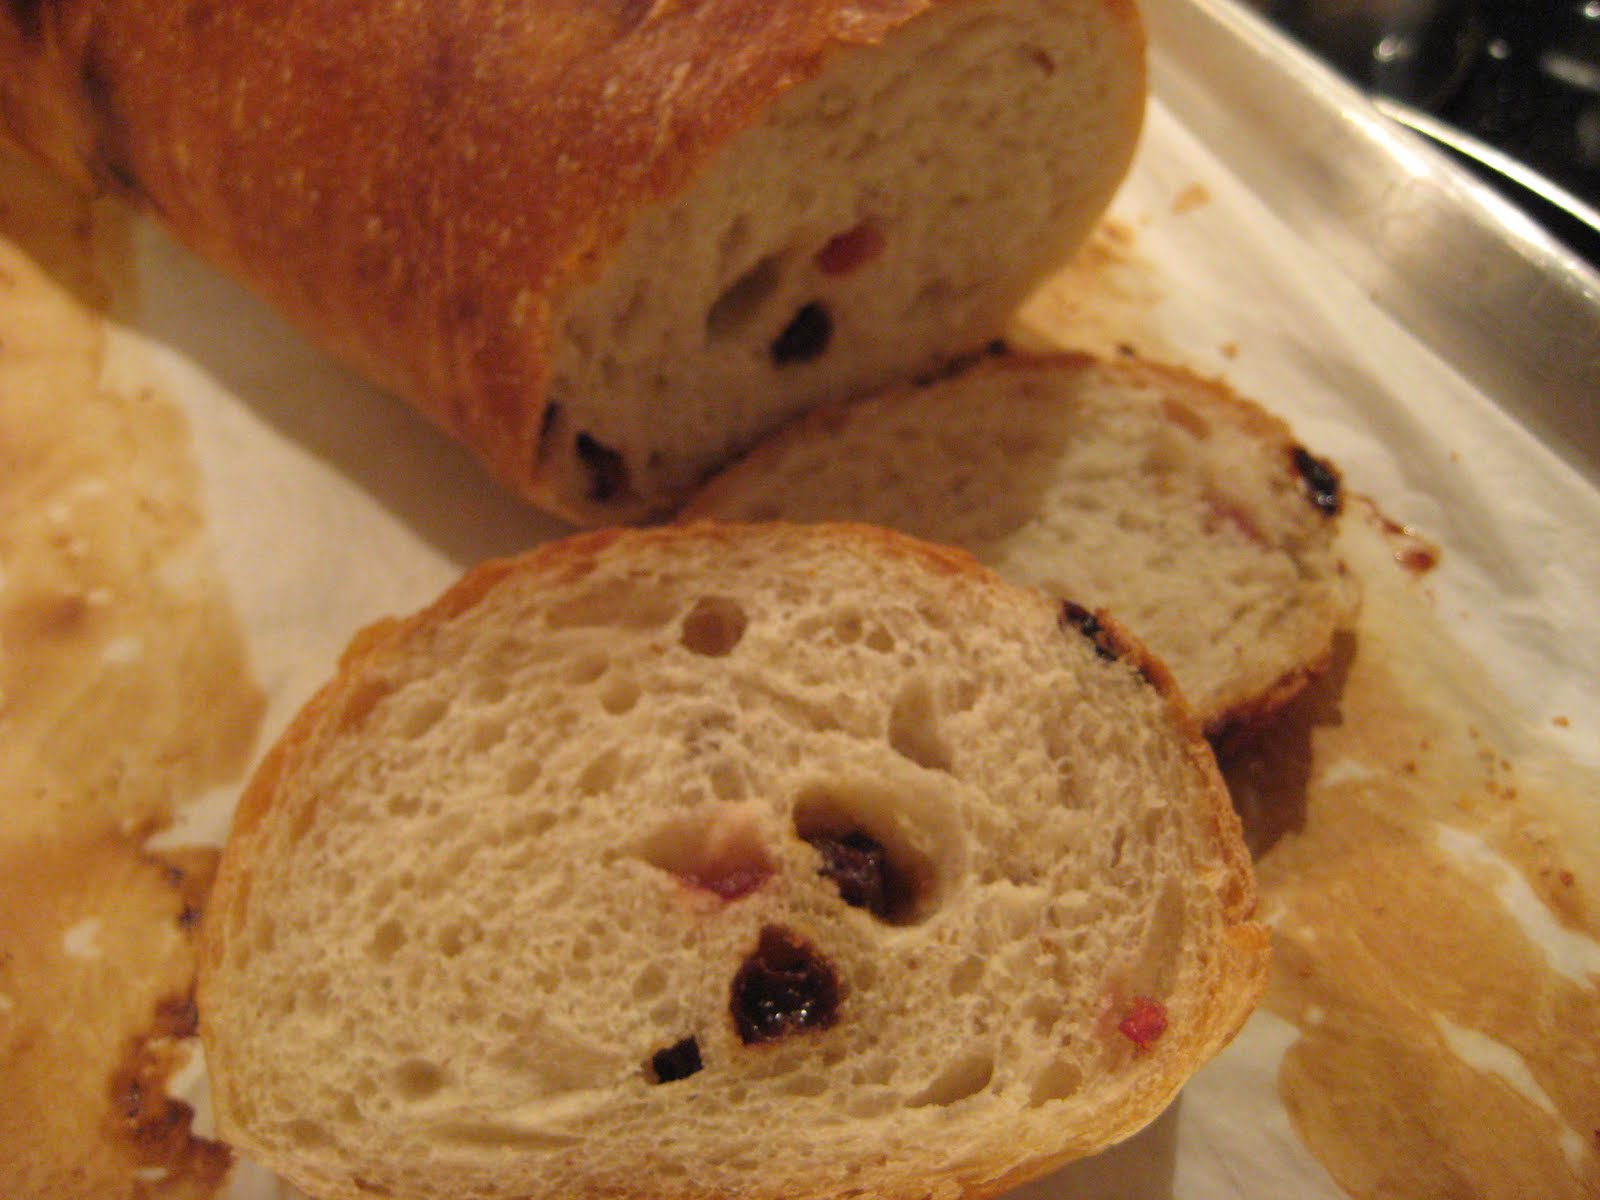
I have several recipes for raisin cranberry bread that I enjoy making but for this particular bread I used a recipe I have for a Sourdough Multigrain Bread and tweeked it a bit by omitting the mixed grains and seeds and adding the dried fruit to it. I suppose now that this recipe has been so altered I really should call it Sourdough Cranberry Raisin Baguettes as it has little resemblance to the former. The dough comes together quite nicely, and instead of shaping the dough in boules as I normally would, I shaped them into baguettes so that when sliced you have small rounds of crispy bread to top with cheese.

I didn't take of photo of prepared platter of crispy bread thins and cambozola or of my guests enjoying them so you'll have to take my word they were pretty good.

I have since then tweeked this recipe again to Sourdough Cranberry Walnut Baguettes and again I shaped the dough into baguettes only this time I didn't bother to toast the slices and they were a very nice accompaniment to baked brie.
Yeastspotted.
Sourdough Raisin Cranberry Baguettes

500 grams unbleached all-purpose flour
150 grams liquid sourdough starter made with whole-wheat flour, refreshed 12 hours earlier
½ teaspoon instant yeast
20 grams olive oil
1⅞ tsp. salt
280 grams water, at room temperature
50 grams raisins
50 grams dried cranberries

In the bowl of the mixer, mix water and sourdough starter. Add flour, and instant yeast.
Mix for a minute to form a rough mass. Turn mixer off and let the dough rest for 20 minutes. Add salt, raisin and cranberries mix for 5 minutes on #4 setting.
Place the dough in a container that has been sprayed with Pam or oiled. Allow to rise until almost doubled.
Divide the dough into 2 portions and form into a ball and allow to rise again covered until almost doubled.
Form balls of dough into baguettes, place on parchment paper and allow to rise until doubled or well puffed.
One hour before baking preheat the oven to 450°F.
Place the baguettes on the baking stone and throw in about 4 or 5 ice cubes on a cast iron pan set on the floor of the oven to create steam.
Bake the bread for about 25 minutes rotating halfway through baking.
Cool bread before slicing.

Tuesday, December 21, 2010

Christmas Cookies - Spitzbuben


Long before the season was in full swing I announced that I would not be baking as many cookies as I usually do for Christmas. I had decided with full conviction that I would bake two batches of the most popular cookies and that would be it. But as the season approached, the pull of baking one or two more cookies - new cookies that I had not baked before - was too great to resist and so I found myself leafing through seasonal magazines yet again for new recipes. One of these recipes was for Spitzbuben, a sandwiched cookies that I had always wanted to bake. I had even bought the proper cookie cutter.

The ingredients for the dough consist of your basic sugar cookie dough; butter, icing sugar, egg yolks, flour and salt. Once the dough is mixed it is wrapped and refrigerated for one hour. The dough is then divided into six even pieces and each piece is rolled out to a 9" square. Using a 2" round cookie cutter cut out circles of dough, then you cut an equal amount of circles with a special insert to the cookie cutter that cuts a decorative hole in the centre. The dough is baked and cooled.

Meanwhile seedless raspberry jam is heated in a small pot to thicken and reduce by one quarter and because there are chocoholics in the family I decided to make a chocolate ganache as well to fill the cookies.

About a teaspoon of filling is spread over a cookie and another cookie, with the decorative hole, is dusted with icing sugar and placed on top. It takes a bit of time to put these cookies together but in the end you are rewarded with a really pretty cookie that tastes really good.

I've also baked Cinnamon Rugelach, Lora Brody's Rugelach, Kifli, French Macaroons and Pecan Tarts and made White Chocolate Bark with Pistachios and Cranberries and Truffles. So much for two batches only - maybe next year.


A tin of cookies ready for giving.
Merry Christmas everyone!

Spitzbuben


3/4 lb. butter, softened (3 sticks)

1-1/2 cup icing sugar

3 egg yolks

3-1/2 cups flour

Pinch of salt

1 cup seedless raspberry jam

Icing sugar for dusting

Beat butter and icing sugar until light and fluffy. Add egg yolks one at a time beating until smooth after each addition. Mix flour and salt together and then add flour mixture 1/2 cup at a time beating between additions. Scrape the dough onto a large sheet of plastic wrap. Press into a 9" x 11" rectangle and cover with plastic wrap. Refrigerate for 1 hour.

Preheat oven to 325 F. Place two racks evenly spaced in the centre fo the oven. Divide chilled dough into 6 even pieces, then rewrap 5 pieces and put back in fridge.

On a lightly floured surface, work one dough piece at a time. Keeping surface and dough floured, roll dough into a 9" square. Using a to 2" round cookie cutter, cut out circles of dough and transfer them to a cookie sheet lined with parchment paper, spacing cookies about 1" apart (reserve dough scraps for rerolling later). Repeat process with remaining chilled dough pieces, then combine leftover scraps into a ball, reroll and continue circles until most of the dough is gone. Using small star cookie cutter punch a hole in the centre of half of the circles - these will become the tops. Bake all cookies in batches, rotating pans on racks halfway through, until cookies are a pale-golden colour, about 15 minutes. Let cookies cool.
Pour raspberry jam into a samll pot and heat over medium until it comes to a boil, stirring every so often. Reduce heat to medium-low and simmer, still stirring, until thickened and reduced by one-quarter, about 5 minutes. Transfer jam to a bowl and cool.

Using a fine-mesh sieve, dust cookie tops with icing sugar. Turn whole cookies upside down and spoon about 1 teaspoon of jam onto each cookie. Using a small spatuala, spread jam to 1/8" of the edges leaving a small mound of jam in the centre of the cookie. Cover each with a cookie top. Serve cookies immediately or store between sheets of waxed paper in an airtight container at room temperature or freeze.


Thursday, July 1, 2010

Tiramisu Cake


Tiramisu is probably my all time favourite dessert, with strawberry shortcake and trifle coming in at a close second. A few years ago I came across a recipe for a Tiramisu Cake in a magazine. Instead of layering the tiramisu with lady fingers and mascarpone cream, you use layers of a plain yellow cake. I was so intrigued with this new method that I just had to make it. That was a few years ago but it had been on my mind so I thought I would make it again for my husband Randy’s birthday.

The recipe calls for a cake mix (what’s a cake mix? – sounds like a compilation of music my daughter would burn on a CD to bake my cake by). I baked my own cake from a recipe that I found in The Good Housekeeping Cookbook many years ago for Yellow Cake, which is an exceptionally easy cake to make and tastes pretty good as well. You certainly could use a gĂ©noise for this recipe – as a matter of fact it would probably be ideal for this cake. It is also advisable to bake the cake a day before, otherwise you’ll be in the kitchen most of the day baking and assembling the cake.

The cake is baked in two 8” round pans and once they are baked you use only one of the cakes and put the other away for another use. The cake is then sliced in half so that you have two layers.
The cream mixture is mixed as any other tiramisu recipe: beat the egg yolks with sugar over simmering water until very light and when cooled add the mascarpone and whipped cream.
You need lady fingers to decorate the sides of the cake and you can buy them at the bakery if you can find the soft kind but I decided to make my own. I used the recipe from the Cake Bible by Rose Levy Beranbaum. Making lady fingers is pretty easy — you need a piping bag and parchment with lines three inches apart penciled in to keep the ladyfingers uniform. Just flip the parchment so you aren’t piping on the pencil marks.


The cake is brushed with a coffee-liqueur mixture (I used cognac), layered with mascarpone, another cake layer, again brushing with coffee-liqueur mixture and another layer of mascarpone. Then you grate chocolate curls and generously sprinkle them on the top. The ladyfingers are placed on the sides of the cake as a finishing touch and voila, you have a Tiramisu Cake.


I refrigerated the cake overnight and brought it over to my parent’s house so that we could celebrate Randy’s birthday with everyone and celebrate Father’s Day as well. The cake was delicious and was enjoyed by all.
A few days later I made a strawberry shortcake with the remaining cake layer.

I’ll be in Italy for the next couple of weeks but I look forward to reading your comments on my return.
HAPPY CANADA DAY

Tiramisu Cake

1 box (18.25 oz.) yellow cake mix or make your own from scratch
4 egg yolks
1/3 cup plus 1 tbsp. confectioners’ sugar, divided
¾ cup chilled heavy cream
1 tsp. Vanilla
2 containers (8 oz. each) mascarpone, softened
1 cup cold espresso or strong coffee with 2 tbsp. cognac or favourite liquor.
1 cup grated dark chocolate
1 pkg. Store-bought ladyfingers (about 24) or make your own from scratch (recipe below)

In small bowl with electric beater, beat egg yolks and 1/3 cup confectioners’ sugar until mixture is thick and pale yellow, about 2 minutes.
Place bowl with egg and sugar mixture over saucepan of simmering water, and whisk until mixture reaches 160 F. Remove from heat and cool.
In a small bowl with electric beater, beat heavy cream until frothy. Add vanilla and remaining 1 tbsp. confectioners’ sugar, and continue beating until soft peaks form.
Place mascarpone in a large bowl, then fold in egg and sugar mixture to incorporate completely. Follow by gently folding in freshly whipped cream.
Slice one of the cooled cakes into two layers horizontally. (Freeze remaining cake to use later.)
Place first cake layer on cake plate. Brush layer with 1/2 cup espresso and cognac. Spread ½ of the whipped cream mixture over that. Place the second layer of cake over the cream and brush with remaining coffee and top with remaining cream. Sprinkle top with grated chocolate.
Press ladyfingers gently into side of cake so that they stand upright and are evenly spaced around its perimeter. Cover cake with plastic wrap, and refrigerate at least 8 hours or, if possible, overnight

Yellow Cake
Good Housekeeping Cookbook

2-1/4 cups cake flour
1-1/2 cups sugar
¾ cup shortening
¾ cup milk
3 large eggs
2-1/2 tsp. baking powder
1 tsp. salt
1 tsp. vanilla extract
½ tsp. almond extract

Preheat oven to 375 F.

Combine all ingredients in large bowl of electric mixer. Mix for 1 minute at low speed then for 5 minutes at high speed. Place in a bundt, tube or 2 9-inch round cake pans. Bake large cake 35 – 45 minutes; round cakes 30 minutes.
Note: This is a good all purpose cake. It makes a delicious strawberry shortcake.

Biscuit a la Cuilliere - Lady Fingers
The Cake Bible by Rose Levy Beranbaum
6 large eaggs, separated
¾ cup sugar
2-1/2 tsp. Vanilla
1 tbsp. warm water
1-1/2 cups sifted cake flour
¾ tsp. Cream of tartar
Two large baking sheet, lined with parchment and lined with piping guides (parallel lines 3 inches apart).

Preheat oven to 400 F.
In a large mixing bowl beat the yolks and ½ cup sugar on high speed for 5 minutes or until the mixture is very thick and ribbons when dropped from the beater. Lower the speed and beat in the vanilla and water. Increase to high speed and beat for 30 seconds or until thick again. Sift the flour over the yolk mixture without mixing in and set aside.
In another large mixing bowl beat the whites until foamy, add the cream of tartar, and beat until soft peaks form when the beater is raised. Gradually beat in the remaining ¼ cup sugar, beating until very stiff peaks form when the beater is raised slowly. Add 1/3 of the whites to the yolk mixture and with a skimmer or rubber spatula fold until all the flour is incorporated. Gently fold in the remaining white.
Scoop batter into the pastry bag and pipe out 3-inch by 1-1/2 inch side-by-side “fingers.” Be sure to hold the pastry tube high enough above the surface of the sheet so that the batter can fall feely from the tube and not get flattened by the edge of the tube. There should be a ¼-icnh space between the “fingers” as they spread sideways as they are piped. Sift the powered sugar completely over the fingers. After a few seconds the batter will dissolve and absorb some of the sugar. For a pearled effect, sprinkle with a second coat. Bake 8 to 10 minutes or until light golden brown and springy to the touch. Remove the sheets to racks and cool slightly. To prevent cracking, remove from the sheets while still warm with a long, thin spatula or pancake turner.

Thursday, June 17, 2010

Blueberry Poppy Loaf


Have you ever come across an interesting recipe in a book that you have owned forever and wondered why you hadn’t noticed it before? Well that’s what happened with the Blueberry Poppy Loaf I came across while flipping through More of Canada’s Best Bread Machine Recipes by Donna Washburn and Heather Butt. I can’t tell you why I had missed it all this time, especially since I leaf through this book often.
The interesting part of this recipe is that the bread’s only liquid is sour cream. I love sour cream and I love the flavour and richness it imparts in cakes, but making yeasted bread with it would be a first for me. It also had dried blueberries along with poppy seeds which sounded like a pretty good combination, and one you normally don’t see in bread.

I had seen dried blueberries in the bulk store and remembered that they were quite expensive but I only needed half a cup so really that couldn’t add up to much, right? Well I set off to the grocery store and headed straight to the bulk foods section and there in a bin were tiny little dark blue dried wild blueberries. The price was just over $4.00 for 100 grams so I scooped a little more than I needed and figured that amount would cost only a few dollars. I picked up some other things I needed and went to the check out. It wasn`t until I got to the car that I checked the bill to see just how much the blueberries had come to and it was a good thing I was seated in the car because had I been on a chair I probably would have fallen off of it. The dried blueberries cost $18.00! Even if I only used half the blueberries I bought that still would be a lot. Well I thought this better be really good bread for that price. I shudder to think what they would charge for this bread in a bakery. Anyway I was still looking forward to making this bread.

It was super simple to put together especially since I just had to throw all the ingredients into the bread machine pan and let it do all the mixing. The recipe called for ½ cup of poppy seeds but I thought that seemed like an awful lot so I just used ¼ cup. The dough mixed up quite nicely and I let it rise in the pan. When it was doubled I divided the dough in two portions and shaped them into batards. I allowed the shaped dough to rise again until doubled and then baked them in a preheated oven. As I’ve mentioned before I never bake bread in the bread machine.
The loaves baked up beautifully and I couldn’t wait to try this million dollar bread. When they were just cool enough I sliced into a loaf to try it out. It was excellent! The crust was tender crisp as you would expect with the high fat content of all the sour cream in the recipe – a full two cups.

I was glad I had cut the amount of poppy seeds in the recipes because there were plenty in the crumb and I honestly think the full amount would have been far too much. The blueberries were plump with an intense blueberry flavour. I thought the bread was delicious and that making it once in a while given the cost of the blueberries was a justifiable indulgence. I had it the next morning toasted with butter and it was a real treat. I’ll definitely make this bread again even if I have to mortgage the house.
Submitted to Yeastspotting.
Blueberry Poppy Loaf
Make 2 loaves
2 cups sour cream
2 tsp. lemon zest
1-1/2 tsp. salt
3 tbsp. granulated sugar
2 tbsp. vegetable oil
4 cups all-purpose flour or bread flour
1/4 cup poppy seeds
1 tsp. bread machine yeast
1/2 cup dried blueberries
Measure all ingredients expect dried blueberries into baking pan in the order recommended by the manufacturer. Insert pan into the oven chamber. Select Sweet Cycle. Add dried blueberries at "add ingredient" signal.
Or
Set the machine to dough cycle. When the cycle is complete allow the dough to rise until doubled.
Divide the dough into two pieces and shape each piece into a batard or free form loaf. Allow to rise until double and bake in a preheated 400 F. oven.
If you don't have a bread machine you can use a mixer.
Combine sour cream, lemon zest, salt, sugar and yeast. Add the flour and poppy seeds and mix using dough hook for about 5 minutes. Remove the dough from bowl and on a lightly floured roll out the dough and add the blueberries. Roll the dough up and knead for a few minutes to incorporate the blueberries. Place in a greased bowl and allow to rise until doubled. Divide the dough into two and shape into free form loaves. Cover with plastic wrap and allow to rise until doubled. Preheat oven 30 minutes before baking. Bake the loaves for about 30 to 40 minutes or until deep golden brown.

Tuesday, June 1, 2010

Grammy's Chocolate Cookies


My daughter Andrea is giving her best friend Eryn a bridal shower at the end of July, just a week after I get back from Italy, and Andrea has asked me to help her out. I won’t give away everything we are making for the shower just in case Eryn reads this, but I can say that I will be baking some cookies for the event. As well, my friend and neighbour Maria asked if I would bake some cookies for her son’s fiancĂ©’s shower, taking place the day after I get back. So I will hit two birds with one stone by baking big batches of cookies ahead of time for both parties. I asked Andrea, while she was on the phone with Eryn one day, to ask her what kind of cookies she likes and without any hesitation Eryn said “anything with chocolate”.

As I flipped through my binder of recipes for cakes and cookies I’ve collected over the years I came across a chocolate cookie that would fit this bill. Grammy's Chocolate Cookies are chocolaty crisp cookies that would satisfy any chocolate lover as the recipe has a generous ¾ cup of cocoa powder and it yields over 100 cookies, plenty for both showers.

I can just picture Grandma baking up a batch of this easy cookie for all her grandchildren when they come to visit and I can picture all her grandchildren dunking these delicious cookies in their glasses of milk and devouring every single bite.

They really are very simple to whip up. Mix the butter, sugar and eggs until light a fluffy and gradually add a mixture of dry ingredients, flour, baking powder, cocoa, salt into the egg mixture. Refrigerate the dough for one hour and then roll the dough into one inch balls and dip the top of th cookie into a bit of granulated sugar. Place the balls onto parchment paper on a cookie sheet and bake for 8 to 10 minutes. The little balls of dough flatten out as they bake. I placed them into freezer bags to keep for the shower.


Grammy’s Chocolate Cookies
Makes about 100

2 cups all-purpose flour
3/4 cup Dutch-process cocoa powder
1 teaspoon baking soda
½ teaspoon salt
1-1/4 cups unsalted butter, room temperature
2 cups sugar, plus more for dipping
2 large eggs
2 teaspoons pure vanilla extract

1. Sift together flour, coco powder, baking soda, and slat. Set aside.
2. In the bowl of an electric mixer fitted with the paddle attachment, beat butter, sugar, and eggs on medium speed until light and fluffy, about 2 minutes. Add vanilla, and mix to combine. Gradually add dry ingredients, and combine with mixer on low speed. Cover bowl with plastic wrap, and chill until dough is firm, about 1 hour.
3. Heat oven to 350 F. Line baking sheets with parchment paper or Silpat mats. Roll dough into 1-inch balls. Dip top of each ball into sugar. Place on prepared baking sheets about 1-1/2 inches apart. Bake until set, about 8 minutes. Transfer to a rack to cool. Cool on Baking Sheets for 5 minutes before transferring to a wire rack to cool