Saturday, January 29, 2011

French Country Boule


I'm afraid I collect cookbooks like some women collect shoes. That might not be the best analogy in my case but you get the point. I cannot resist buying cookbooks and should that cookbook be on bread promising an artisan type loaf or even better a glorious fruited bread out of your own oven, well then I'm sunk, hook, line and sinker. Sometimes I will buy several books at the same time and as much as I try to bake something from all of them, one or two will inadvertantly end up on the book shelf unused until I am inspired to try something new. So for this bread I turned to Local Breads by Daniel Leader, a first from this book. Flipping through the pages I came across a recipe for French Country Boule (Pain de campagne) that sounded pretty good to me. You certainly can't go wrong with a bread made from a sourdough culture and with my trusty culture in the refrigerator waiting for expansion I was well on my way.


The night before I added some water and flour to the liquid soughdough culture and by morning it had doubled.

The dough has some whole wheat and rye flours as well as A/P flour and mixed up to a lovely dough. It is a fairly soft and tacky dough so it needs a banneton to support it in its final rise. The recipe makes two boules and I only have one banneton so I improvised by using a bowl lined with a clean cotton towel. The banneton and towel lined bowl have to be heavily dusted with flour to ensure that the dough doesn't stick and I have to admit I always fret about this step as I have had stubborn fully risen doughs that have not pulled away without some persistant coaxing. I'm always afraid that I will be left with a completely deflated loaf.


But this was not the case with this particular bread and they both came out of their molds without a hitch. Of course I had flour flying all over the place but at least my boules were intact. Scoring the bread wasn't easy - either my serrated knife wasn't sharp enough or the dough was too soft and I think I'll blame the latter. In any case I managed to score each bread differently mostly because the criss cross design took some doing so I opted for a more straight forward slash for the second boule.

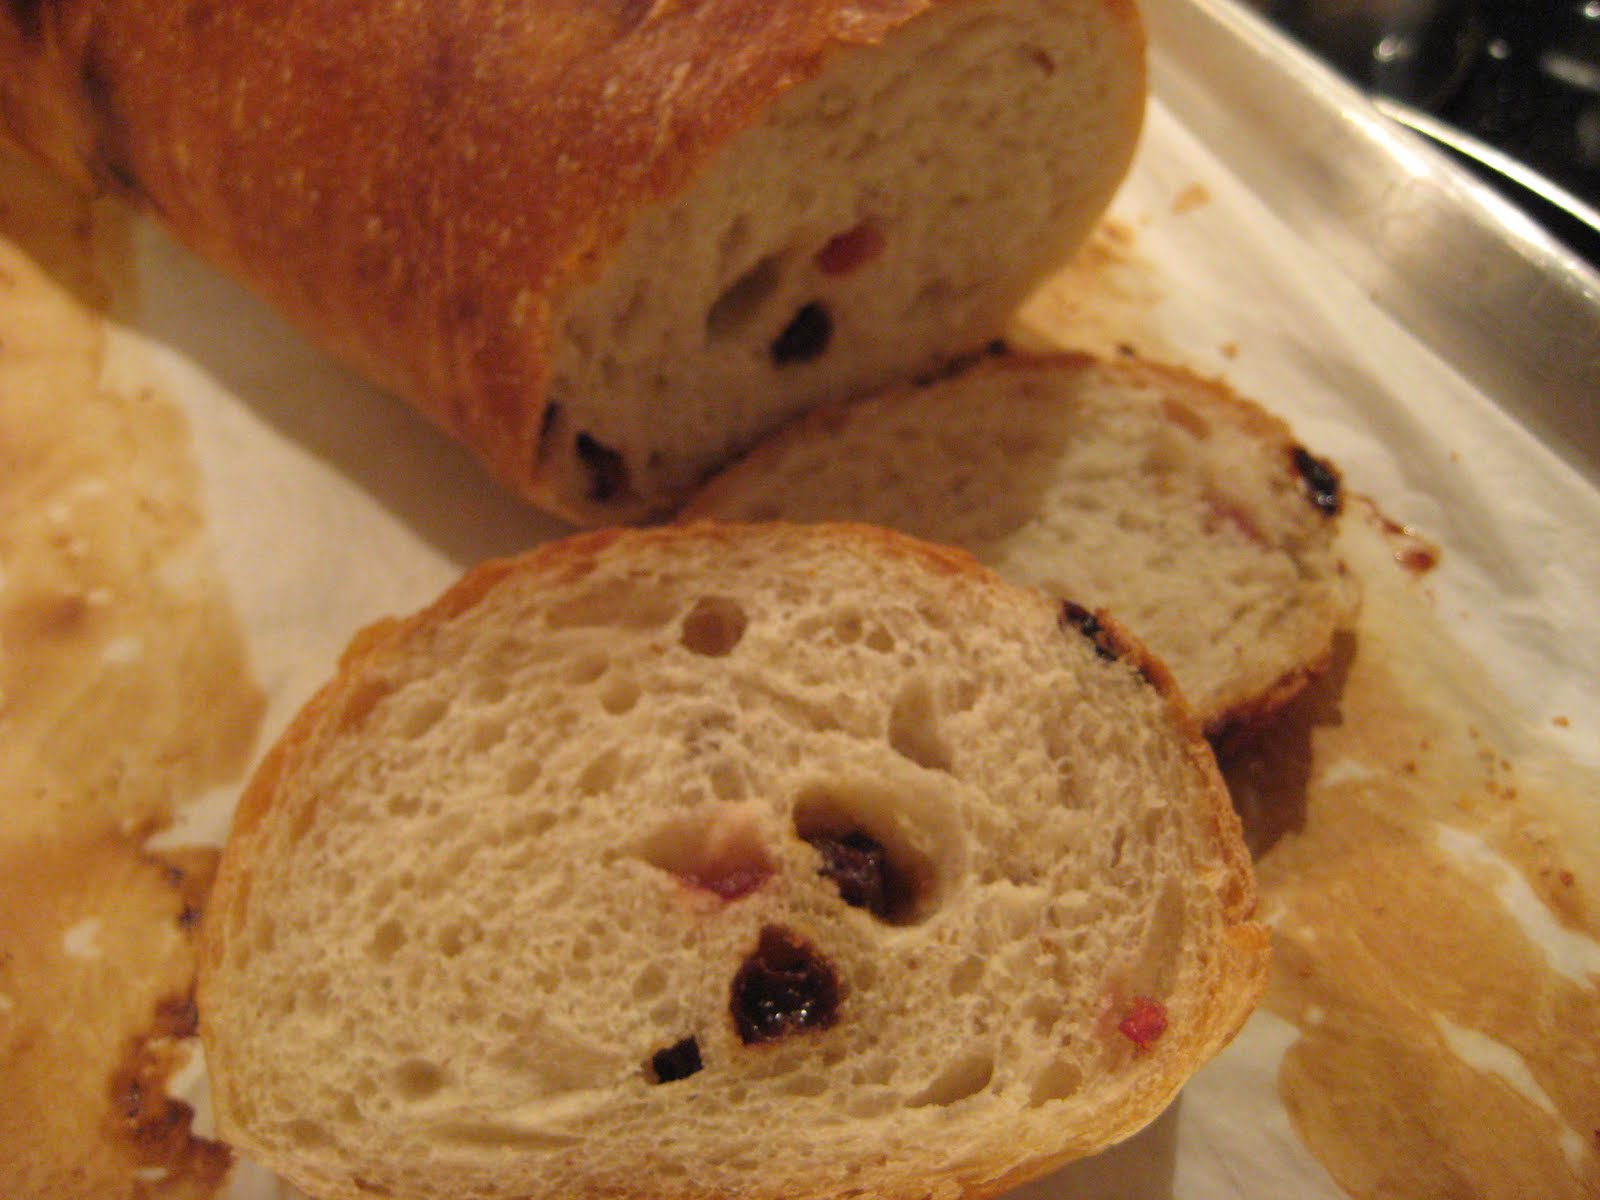
After baking the boules in a 400 F. oven for about 25 minutes they were done. I thought they looked pretty good. After cooling I just had to have a taste and I was not disappointed at all. The bread is quite springy with a very nice crumb so a sharp serrated knife to slice through easily is key. I certainly would make this bread again. Mr. Leader you make good bread.
On the very day that I baked these boules a package was delivered to my door. I wonder what it could be. It was too thin to be from Zappos.


As I mentioned I'm a real sucker for bread cookbooks and when I read about this one I just had to order it.
French Country Bread
Pain de champagne

Liquid Levain Starter

50 grams liquid levain
175 grams Water, tepid
135 grams Unbleached all-purpose flour

Pour the liquid levain ito a small bowl. Pour in the water and stir with a rubber spatula. The levain will froth. Mix in the flour until the mixture is fairly smooth, scraping down the sides of the bowl. Cover with plastic wrap and let stand at room temperature for 8 to 12 hours. When ready, it will have expanded by about one third and the surface will be bubbly, like a large pancake ready to be flipped. It will have a wheaty fruity, mildly tangy aroma.

Bread Dough

250 grams Water, tepid (70 to 78 degrees)
440 grams Unbleached all-purpose flour
30 grams Stone-ground whole wheat flour
30 grams Fine or medium rye flour
310 grams Liquid levain starter
10 grams Sea salt

Pour the water into a large mixing bowl of a stand mixer. Add the bread flour, whole wheat flour, and rye flour and stir with a rubber spatula just until it absorbs all the water and a rough dough forms. Cover with plastic wrap and let stand at room temperature for 20 minutes to hydrate the flour and give the gluten a chance to develop on its own.
Add the Levain in and Salt. Stir the levain with the spatula to invigorate and deflate it. Scrape it into the bowl of dough. Sprinkle the salt over the dough. Use the spatula to blend the levain and salt into the dough.
Use the dough hook and mix the dough on medium speed (4 on a KitchenAid mixer) until it is smooth, 8 to 9 minutes. It will be soft and tacky but will clean the sides of the bowl.
Ferment the Dough. Transfer the dough to a lightly oiled, clear, straight-sided 2-quart container with a lid. With masking tape, mark the spot on the container that the dough will reach when it has doubled in volume. Cover and leave it to rise at room temperature (70 to 75 degrees) until it inflates into a dome and reaches the masking tape, 2-½ to 3-1/2 hours. It will feel springy and less sticky.
Divide and shape the boules. Heavily dust the bannetons or two bowls lined with kitchen towels with flour. Lightly dust he counter with flour. Scrape the dough onto the counter. With a bench scraper or chef’s knife, cut the dough into 2 equal pieces (560 grams each). Shape each piece into a boule. If you don’t achieve a perfect round, leave it. It’s important not to overwork the dough. Place each round, smooth side down, in a prepared banneton or bowl. Lightly sprinkle with flour and cover loosely with plastic wrap.
Proof the boules. Let the boules stand at room temperature until they become pillowy and nearly double in size, 1 to 1-1/2 hours. When you press your fingertip into the dough, the indentation will spring back slowly.
Prepare the oven. About 1 hour before baking, place a baking stone on the middle rack of the oven and cast-iron skillet on the lower rack. Heat the oven to 450 degrees.
Score the Boules. Lightly flour a baker’s peel or rimless baking sheet. Uncover the loaves and tip them out onto the peel or sheet, guiding them fro a soft landing and arranging them at least 2 inches apart. With a lame, a single-edged razor blade, or a serrated knife, make 3 parallel slashes centered on each loaf, each about ½ inch deep.
Bake the boules. Slide the loaves, still on the parchment, onto the baking stone. Place ½ cup of ice cubes in the skillet to produce steam. Bake for 15 minutes. Reduce the heat to 400 degrees and continue to bake until the boules are red-brown, 20 to 25 minutes.
Cool and store the boules. Slide the peel or the rimless baking sheet under the parchment paper to remove the loaves from the oven. Slide the loaves still on the parchment, onto a wire rack. Cook the loaves completely, about 1 hour before slicing. Store the cooled loaves in a brown paper bag. They will stay fresh for about 4 days. For longer storage, freeze in resealable plastic bags for up to 1 month.

Sunday, January 23, 2011

Eryn's Shower


Last summer I promised my daughter's friend Eryn that I would write something about her shower. I know it's a bit late but this is for you Eryn.

My daughter Andrea met Eryn in Grad school where they were both studying architecture. There they became friends and found that they had a lot in common and soon became inseparable. When Eryn became engaged, she asked Andrea to be her maid of honour. Delighted, Andrea decided she would host a bridal shower for her and so she asked me if I would prepare some food for the event and of course I was more that happy to help.
Andrea worked very hard taking care of every detail, including designing the invitations, so that the shower would be a success. The invitations were sent and replied to and soon the special day arrived. It was a beautiful warm sunny day, which we'd hoped for so that we could have the shower outside. It was a bit breezy but no one seemed to mind. Everyone arrived to drinks and hor'dourves and bruschetta and then the shower games began.


Everyone seemed to enjoy themselves including Reena who flew in from Lagos.
Mary the mother of the bride-to-be and close friend Aline were having too much fun trying to guess how many nuts were in the boxers. I think they wanted to win the prize.
The luncheon included four different quiches; crab, quiche lorraine, asparagus and broccoli, spinach and pear and feta cheese salad, a pasta salad and Rose's Best Buns.

For dessert I had made sugar cookies in the shapes of flowers decorated with royal icing in the theme colours of pink and light green. There were also chocolate cookies, slices of currant pound cake, and truffles and fruit on the dessert table. But the crowning glory was the lovely cake by Irene's Cakes. It was a mixed berries shortcake covered with fondant and decorated with pink, green and yellow flowers.


Eryn opened her gifts, one of which she would not take out of the gift bag because it was naughty.

It was fun watching her giggle uncontrollably.
Eryn with Geraldine, her mother-in-law to be, and her mother Mary.


Each guest left with a party favour - an espresso cup and saucer with truffles wrapped in cellophane.

In September Eryn married her long time boyfriend Chris, a sailor who competed in the 2008 Olympics in Beijing, in a lovely ceremony by the lake.

Sunday, January 16, 2011

Rosemary Baguettes


My parents always had rosemary growing in their garden, that wonderfully fragrant herb that flavoured our Sunday roasts and many other dishes my mother would prepare for us. When I acquired a yard of my own I began to grow rosemary as well so that I could have on hand sprigs of this herb to flavour my roasts and sauces. The only downside of growing rosemary in Canada is that it does not survive our long cold sub-zero winter season. My rosemary grows in a large container that I bring indoors sometime in November for the winter. The funny thing is that I store it in my cold cellar which has a small window and during the winter months its temperature is around zero degrees Celsius, and there it thrives. I have tried leaving it in a warmer room of the house but the environment caused the leaves to mildew, and eventually the rosemary plant would succumb to this powdery white invader and die. In the cold cellar as the days get longer the plant receives more sunlight and it begins to bud. By April or May depending on how cold the nights are I put the plant outdoors again and the buds open up to pretty little blue flowers.


One of my favourite ways to use rosemary is in bread. Though rosemary has a distinct and pungent flavour, when baked in bread its flavour isn't over powering at all. For this particular bread I use my old and faithful recipe for Basic Bread for Fougasse by Patricia Wells. I love this wonderful and versatile straight method dough that I use often for baguettes and pizzas, as well as the Onion Focaccia that I have posted a while ago and where you will find the recipe.

I just chop up about one tablespoon of rosemary and add it to the dough. I love the little green speck of rosemary and the soft dough is marvelous to work with.

After its final rise I shape and slash the bread and bake it in a hot 425 degrees F. oven and while it is baking the house is filled with a wonderful aroma. When I pull the baquettes out of the oven I can hardly wait to have a slice, but to resist the temptation to cut into the bread, I leave the room and come back later to enjoy a slice with butter. This bread is especially wonderful with roasted meats.
Yeastspotted.

Tuesday, January 11, 2011

Toasted Raisin Cranberry Slices


I love hors d'oeuvres but quite frankly do not enjoy making them at all. I find them time consuming and finicky to make and they are the last thing I think about when I am having people over for dinner. Eventually however, I do have to think about what to serve as a pre- dinner course so when the idea to serve baked brie or cambozola on crispy slices of raisin cranberry bread came to me I was quite pleased with myself and wondered why I hadn't though about this sooner. I would make the bread in advance, toast the sliced bread and store them in the freezer until I needed them, then just arrange them and the cheese on a platter and voila easy peasy.

I have several recipes for raisin cranberry bread that I enjoy making but for this particular bread I used a recipe I have for a Sourdough Multigrain Bread and tweeked it a bit by omitting the mixed grains and seeds and adding the dried fruit to it. I suppose now that this recipe has been so altered I really should call it Sourdough Cranberry Raisin Baguettes as it has little resemblance to the former. The dough comes together quite nicely, and instead of shaping the dough in boules as I normally would, I shaped them into baguettes so that when sliced you have small rounds of crispy bread to top with cheese.

I didn't take of photo of prepared platter of crispy bread thins and cambozola or of my guests enjoying them so you'll have to take my word they were pretty good.

I have since then tweeked this recipe again to Sourdough Cranberry Walnut Baguettes and again I shaped the dough into baguettes only this time I didn't bother to toast the slices and they were a very nice accompaniment to baked brie.
Yeastspotted.
Sourdough Raisin Cranberry Baguettes

500 grams unbleached all-purpose flour
150 grams liquid sourdough starter made with whole-wheat flour, refreshed 12 hours earlier
½ teaspoon instant yeast
20 grams olive oil
1⅞ tsp. salt
280 grams water, at room temperature
50 grams raisins
50 grams dried cranberries

In the bowl of the mixer, mix water and sourdough starter. Add flour, and instant yeast.
Mix for a minute to form a rough mass. Turn mixer off and let the dough rest for 20 minutes. Add salt, raisin and cranberries mix for 5 minutes on #4 setting.
Place the dough in a container that has been sprayed with Pam or oiled. Allow to rise until almost doubled.
Divide the dough into 2 portions and form into a ball and allow to rise again covered until almost doubled.
Form balls of dough into baguettes, place on parchment paper and allow to rise until doubled or well puffed.
One hour before baking preheat the oven to 450°F.
Place the baguettes on the baking stone and throw in about 4 or 5 ice cubes on a cast iron pan set on the floor of the oven to create steam.
Bake the bread for about 25 minutes rotating halfway through baking.
Cool bread before slicing.